
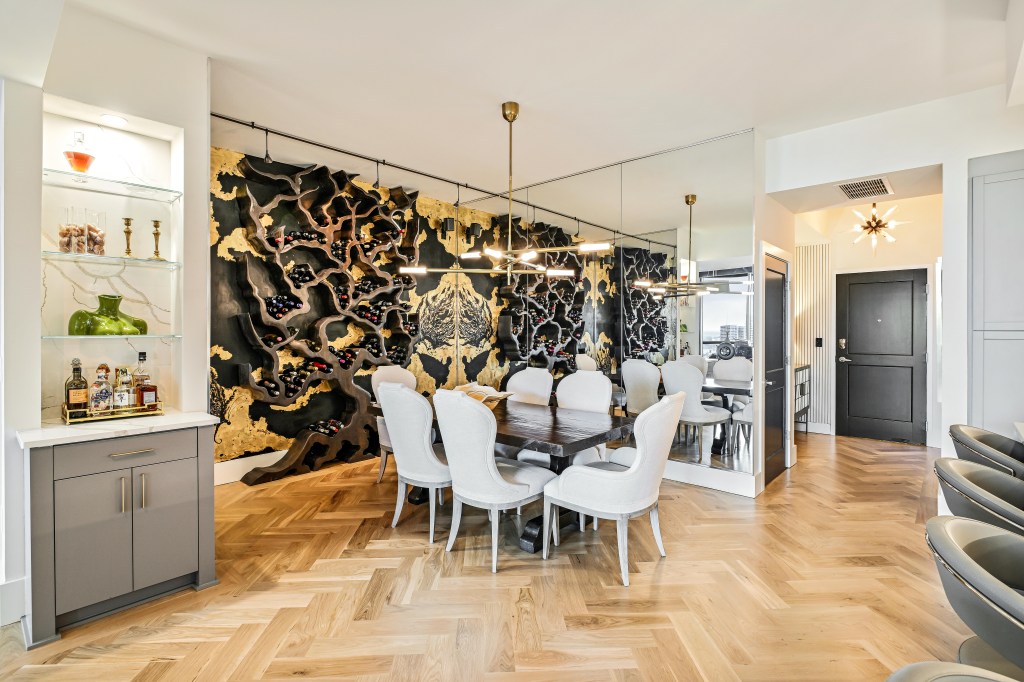

The border question comes up early in most herringbone conversations. It is worth deciding at the start, because it affects how the installation is sequenced, how the perimeter resolves, and how the finished floor reads in the room, and the decision is made before the herringbone is installed.
The decision follows from four things: the architectural character of the home, what the floor needs to do visually, how the pattern resolves at the perimeter, and the scale of the room relative to the field.
The quick answer
A border tends to make more sense when:
- The home is traditionally detailed, period, or formally designed
- The herringbone is installed at 45 degrees, which creates diagonal perimeter cuts a border resolves cleanly
- The room has irregular geometry, multiple doorways, or complex edge conditions
- The floor is meant to read as a contained, framed element
Borderless tends to make more sense when:
- The pattern runs through multiple connected rooms and continuous flow is the visual goal
- The home is contemporary or minimalist and a perimeter frame would introduce formality that works against the design
- The room is small and an additional perimeter line would reduce the sense of space
Neither is the default. The conditions decide the answer.
Two Georgia projects — the same decision reached differently
Buckhead, Atlanta — picture-frame border, site-finished solid white oak
- 24th-floor high-rise, HOA-managed building
- Non-rectangular open-plan layout, approximately 1,500 square feet
- Herringbone at 45 degrees
- 5-inch width, 20-inch length solid white oak, full-spread glue-down in WAKOL MS 260 over 6 mm cork on concrete
- Site-finished with LOBA EasyPrime and two coats of LOBA 2K Duo, satin
- 7-inch tongue-and-groove picture-frame border, integrated and sanded flush as one continuous surface
Three conditions pointed toward a border here. The pattern ran at 45 degrees — every field piece terminated diagonally at the walls, and the border gave those terminations a straight, clean stopping point across a complex non-rectangular perimeter. The architectural character of the space was formal — a premium Buckhead high-rise condo where the floor needed to read as a deliberate architectural element. The site-finished approach meant the border was sanded and finished as part of the same surface, with no height variation or visible break between field and frame. The border was Classy Flooring ATL’s proposal, and it also gave a consistent edge at the base of a floor-level sculpture that stayed in place throughout the work.
The non-rectangular layout introduced specific execution demands. Fixed art and furniture placement created constraints at certain wall conditions, so the border turned more corners than a simple rectangle would need, and every corner was mitered at 45 degrees. Because the walls were not perfectly straight — which is normal in any real building — we cut the wall-side edge of the border to follow each wall’s actual line, while keeping the field-side edge geometrically true to the herringbone pattern. The irregularity is absorbed on the wall side, and the field side stays true to the pattern. The detail photography from this project shows exactly where this work was done.
You can see the full project documented here: Buckhead white oak herringbone with custom border
Monroe, Georgia — integrated border, prefinished engineered white oak
- New construction home, concrete slab
- 180 square feet of herringbone at 45 degrees, border included
- 9.5-inch wide, 5/8-inch thick prefinished engineered white oak, four-sided micro-bevel
- Glued with WAKOL MS 260
- Herringbone pieces shop-fabricated from the same prefinished stock, each 9.5 inches wide and 48 inches long; border a single board width around a 60-linear-foot perimeter
At 180 square feet, the field was compact relative to the room. A border helped it read as a deliberate, contained element rather than a pattern that simply stopped at the wall. The border boards were cut from the same prefinished material as the field, with the micro-bevel recreated along the joint — same finish, same bevel, continuous from field to perimeter.
You can see the full project documented here: Monroe engineered herringbone with custom border
Both projects used the same pattern and both included borders — but for different reasons. The conditions decided the answer in each case.
Three conditions pointed toward a border here. The pattern ran at 45 degrees — every field piece terminated diagonally at the walls, and the border gave those terminations a straight, clean stopping point across a complex non-rectangular perimeter. The architectural character of the space was formal — a premium Buckhead high-rise condo where the floor needed to read as a deliberate architectural element. The site-finished approach meant the border was sanded and finished as part of the same surface, with no height variation or visible break between field and frame.
The non-rectangular layout introduced specific execution demands. Because fixed art and furniture placement created constraints at certain wall conditions, the border could not simply run as a continuous straight line at every perimeter. At those conditions we made 45-degree miter cuts in the border. And because the walls were not perfectly straight — which is normal in any real building — we cut the wall-side edge of the border to follow each wall’s actual line, while keeping the field-side edge geometrically true to the herringbone pattern. The irregularity is absorbed on the wall side, invisibly. The visual integrity of the pattern is preserved on the field side. The detail photography from this project shows exactly where this work was done.
You can see the full project documented here: Buckhead white oak herringbone with custom border
Monroe, Georgia — integrated border, prefinished engineered white oak
- New construction home, concrete slab
- 180 square feet herringbone at 45 degrees
- 9.5-inch wide, 5/8-inch thick prefinished engineered white oak, four-sided micro-bevel
- Glued with Wakol MS 260
- 96 border pieces fabricated on-site from matching prefinished stock, each cut to 48-inch length
At 180 square feet, the field was compact relative to the room. A border helped it read as a deliberate, contained element rather than a pattern that simply stopped at the wall. The border pieces were fabricated from the same prefinished material as the field — same finish, same micro-bevel, continuous from field to perimeter.
You can see the full project documented here: Monroe engineered herringbone with custom border
Both projects used the same pattern and both included borders — but for different reasons. The conditions decided the answer in each case.
How the border width is actually decided
Border width is decided in the actual space. Before installation begins, we present multiple width options and test them visually in the room — the client sees each option at room scale, in their own light conditions, against their own walls, before committing. In the Buckhead high-rise, the 20-inch and 25-inch board lengths were both set out at full scale in the rooms, and the 20-inch was chosen with the owners; the 7-inch border was our proposal after studying the space, and the owners were part of that decision.
This matters because what reads correctly in a room is not always what looks proportional on a floor plan. A border that appears balanced at one width on paper may feel too narrow or too heavy in the actual space. Testing in the room removes that uncertainty before any cutting begins.
Two things affect which widths are viable at all. First, border width has to be coordinated with the herringbone module. The V-pattern has a repeating geometry determined by the board dimensions. If the border width lands in a way that interrupts that geometry mid-repeat, the field appears cut off rather than contained — the border looks imposed on the pattern rather than planned around it. We calculate this before presenting width options to the client, so every option shown is one that works with the herringbone, not against it.
Second, the joint between the herringbone field and the border needs a mechanical connection. NWFA’s ornamental floor guidelines have the field installed past the border line and cut back to it against a straightedge, with the border joined by its tongue and groove, or by a routed groove and slip-tongue where a run meets the field ends. In our work, the field is cut back with a track saw, a groove is routed into that cut edge, and the border’s tongue locks into it. The tongue-and-groove joint indexes the two to the same height and keeps them locked together as the floor expands and contracts with the seasons, so the frame line stays tight; a border held by adhesive alone puts that seasonal stress on the glue line. Planning this connection from the beginning is part of how we approach every bordered installation.
What a border does — and what it does not do
A border is a straight perimeter element — one or more rows of planks — that runs along the edges of the herringbone field and separates the pattern from the walls.
Visually it frames the pattern. Designer Emily Henderson has publicly shown a preference for adding a border in her own herringbone planning, and has framed the broader signal as: borders read more classic, while borderless reads more modern. That is a useful starting point, though what decides the question in any specific project is the conditions, not the style category.
Practically it resolves the perimeter. When herringbone runs at 45 degrees, the diagonal field terminations at each wall benefit from a straight stopping point. A border also absorbs minor wall irregularities without exposing them as visible edge cuts.
Both ways take skilled installation work. A border adds its own steps: NWFA’s ornamental floor guidelines have the field installed past the border line and cut back to it against a straightedge before the border is fitted, and in our work a groove is routed into that cut edge to take the border’s tongue — routing and tongue-and-groove work along every run of border, and a fitted joint at every corner. Without a border, the herringbone runs to the walls and every piece at the perimeter ends in an angled cut fitted to the wall. NWFA’s guidelines take the adjustment for walls that are out of square in the apron, the band around the pattern, so the cuts stay equal; without that band, the adjustment shows in the cuts at the edge of the pattern. Which one a room calls for is a design decision; both depend on the skill of the installer.
The four factors that decide it
1. Architectural character of the home
Traditionally detailed, period, and formally designed spaces tend to carry a border naturally. The framing a border introduces aligns with what the architecture is already doing — cornicing, paneling, significant trim detail. Parquet specialist Finwood, working across period and contemporary properties, recommended a single-row border for a Victorian terrace renovation “to provide a discreet elegant frame,” and a double-row border for a Georgian townhouse refurbishment where the owners wanted “a traditional, elegant touch.” In both cases the recommendation followed from the architectural setting.
In contemporary homes, open-plan new construction, and minimalist interiors, a border can introduce formality that works against the design direction. In those settings, borderless often produces the right result.
2. How the floor needs to read
A bordered herringbone reads as framed and contained. A borderless herringbone reads as continuous — the pattern flows to the edges without interruption. In large open-plan spaces where the floor needs to register as a single uninterrupted surface across multiple rooms, continuity is often the correct goal. In spaces where the herringbone is a focal feature meant to occupy and define a specific area, the border communicates that.
3. How the pattern resolves at the perimeter
At 45 degrees, every field piece terminates diagonally at the walls. A border gives those terminations a clean straight stopping point. Without one, every diagonal cut must be made precisely to the wall and remains visible. In rooms with clean geometry and a parallel layout, the perimeter can resolve clearly without a frame. In diagonal installations, non-rectangular rooms, or spaces with many perimeter conditions, a border resolves those conditions and reduces visible edge complexity.
4. Room scale and border proportion
Border width is confirmed in the space before installation commits. The general principle: narrower borders for smaller rooms, wider for larger rooms. Some installations also use a tramline — a thin contrasting inlay between field and border — to define the frame without increasing its width. In all cases, the final width is one that works mathematically with the herringbone module and reads correctly at room scale.
What we evaluate before recommending
When we evaluate a herringbone project in person, the border question is part of the layout conversation from the start:
- Architectural character — what the home is doing and what the floor should reinforce
- Pattern direction — whether the field terminates diagonally or parallel at the walls
- Room geometry — how many edge conditions exist and whether a border manages them cleanly
- Whether the floor runs through connected spaces and whether a border would help or interrupt
- How the herringbone module lands at the perimeter, which determines what border widths are mathematically compatible
- Material — whether the border comes from the same product as the field and what that means for the finish transition and the mechanical connection
The border decision affects where the field starts, how the field is sized, and how every perimeter condition is managed through the installation. It belongs at the start of the planning conversation.
You can see how this decision was made across different conditions in our custom hardwood pattern installation work in Atlanta.
If you are planning a herringbone floor in Atlanta
Getting the border decision right before installation starts shapes the layout plan, the cutting approach, and how every perimeter condition resolves through the job. It also sets the mechanical connection between field and border from the beginning, so the joint is routed and fitted as part of the installation plan.
For a custom 7-inch border joined to the field with a routed tongue-and-groove across two penthouse residences, see the Savannah European Ash herringbone.
For a herringbone border with a solid brass inlay set at the line between field and border, see the Woodstock European white oak herringbone with brass inlay.
For a fabricated tongue-and-groove border joining a herringbone entrance to an existing straight-run floor, see the Dunwoody fabricated herringbone entrance.
We evaluate this in person for every custom pattern project — examining the actual room conditions, the pattern direction, the perimeter, and what the floor needs to accomplish in the space before making a recommendation. If you are planning a herringbone floor in Atlanta, contact us here.
Frequently asked questions
What are some creative ideas for hardwood floor borders?
Start from the room, then choose the width, the material, and the joint. A picture frame in the same wood is the classic: in the Buckhead high-rise, a 7-inch white oak border runs around the solid white oak herringbone in every room, joined to the field with a routed tongue-and-groove, mitered at 45 degrees at every corner, and carried to the base of a floor-level sculpture. A metal line adds a second material: on the Woodstock estate, solid C360 brass is set flush at the line between the herringbone and its border and left unlacquered to patina. A border in the same product as the rest of the house keeps a feature room quiet, as in the Monroe dining room, where the border is a single board width of the same prefinished engineered white oak with butt-joined corners. A border can also join two layouts, as at the Dunwoody entrance, where a fabricated tongue-and-groove border ties the herringbone to the existing straight-run floor. Smaller details work too: at the Buckhead primary bedroom, the doorway threshold is built from small boards set in varying grain directions. Whatever the idea, NWFA’s ornamental floor guidelines calculate the border’s runs before installation and take the adjustment for walls that are out of square in the apron, the band between the pattern and the wall, so the cuts stay equal.
Can you fit herringbone flooring yourself?
A homeowner can, but herringbone is skilled work at every stage, with or without a border. NWFA’s guidelines start herringbone from working lines, set it out dry to confirm the pattern is balanced, and hold the subfloor to 3/16 inch in 10 feet or 1/8 inch in 6 feet for a glue-down. Every piece meets its neighbors at an angle, so an error in the starting line carries through every course. At the edges, the work goes one of two ways: without a border, every perimeter piece ends in an angled cut fitted to the wall; with one, the field is cut back to a straight line, a groove is routed into the cut edge, and the border is fitted with a tongue-and-groove joint — routing and joinery along every run. In the Buckhead high-rise, each room’s center line was set in WAKOL MS 260 and left to cure for 24 hours before the field was built out; in Savannah, the field edge was cut back with a track saw on a guide rail before the 7-inch border was set.