
Herringbone Fabricated from Prefinished Hardwood Flooring in Atlanta
Classy Flooring ATL fabricates herringbone from the hardwood flooring a homeowner has chosen, or already has in the rest of the house, when that flooring is sold only as straight planks, and installs it across metro Atlanta and North Georgia. In our shop, each board is cut to the size the pattern needs, the tongue and groove are re-milled on the cut edges and the factory bevel is recreated, so every piece carries the same profile and finished edge as the boards it was cut from. We fabricate herringbone from prefinished engineered and solid hardwood as part of the floors we install, working with homeowners and their design firms.
Classy Flooring ATL is led by Claudiu Toma, an NWFA Certified Installer, NWFA Certified Sand & Finisher and NWFA Certified Sales Advisor, who completed NWFA Precision Patterns: Parquet Flooring and NWFA Precision Patterns: Medallions. Every project is carried out by our in-house crew.
Herringbone fabrication starts at $11.00 per square foot, with no minimum. Installation is priced separately: starting at $7.00 per square foot for projects of 1,000 sq ft and up; smaller projects are priced by the job.
We have fabricated herringbone for a 130-square-foot entrance in Dunwoody, from the builder’s 9-inch prefinished engineered plank; for a dining room in Monroe, from the prefinished engineered white oak installed through the rest of the house; and for the catwalk and upstairs hallway of a two-house estate in Woodstock, from 9½-inch RW Floors European white oak, with solid brass inlay along the border.


Flooring we fabricate into herringbone
We fabricate herringbone from tongue-and-groove hardwood flooring, solid or prefinished engineered, at least 1/2 inch thick, and for engineered flooring, with a wear layer of 3 mm or more. Each requirement comes from the fabrication itself. The herringbone pieces are joined to each other and to the border by a tongue-and-groove profile re-milled into their cut edges, so the flooring has to carry that profile and be thick enough for the re-milled tongue and groove to hold.
On engineered flooring, the wear layer is the real wood at the surface, and the bevel on every cut edge is recreated in it. Our minimum is 3 mm, so the recreated bevel and each cut edge stay within the real wood. The wear layer is also the wood a floor is sanded into when it is refinished; NWFA’s sanding guidelines generally advise against sanding a wear layer below 3/32 inch, about 2.4 mm. The builder’s 9-inch plank we fabricated in Dunwoody had a 4 mm wear layer, and the RW Floors plank in Woodstock is 5/8 inch thick with a 4 mm sawn wear layer.
If you have a floor in mind, send us its product name or a sample board through our contact form before it is ordered. The joint profile, the thickness and the wear layer decide whether a floor can be fabricated into herringbone, and we check each product before the herringbone is planned.
How we fabricate herringbone in our shop
In our shop, each plank is cut to the width and length the pattern needs, given a tongue and groove on its cut edges and finished with a recreated bevel, before any piece is installed. In Dunwoody, the builder’s 9-inch plank was ripped into 4¼-inch pieces. In Woodstock, the 9½-inch RW Floors plank was milled to 4½ inches wide and cut into 25-inch pieces for the catwalk and 19-inch pieces for the upstairs hallway. In Monroe, the pieces kept the plank’s full 9½-inch width and were cut to 48 inches on a miter saw.
The tongue and groove lock each piece to its neighbors, so they are re-milled wherever a cut removed them. On the Monroe pieces, a groove was milled into each cut end on a router table, with the same tool and depth for every piece. In Dunwoody and Woodstock, the narrowed pieces were given a new tongue and groove along their cut edges.
A cut also removes the factory bevel, and a square edge would give that joint a different profile from the factory joints around it. On the Monroe pieces, the micro-bevel was recreated by hand with a wood block and 180-grit paper to match the factory profile on the other three sides. On a prefinished floor, each cut edge and recreated bevel is raw wood beside the factory finish. In Dunwoody, they were treated with Rubio Monocoat Fumed and color-matched with Rubio Monocoat Oil Plus 2C in Super White, sampled and approved before the work went ahead, and the factory face was left untouched.


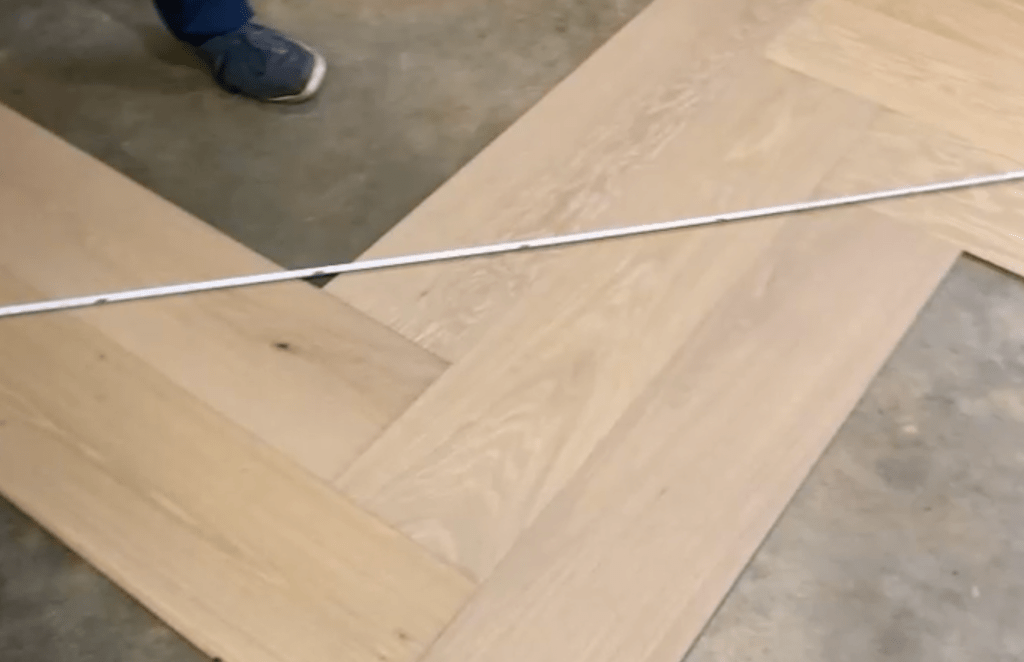
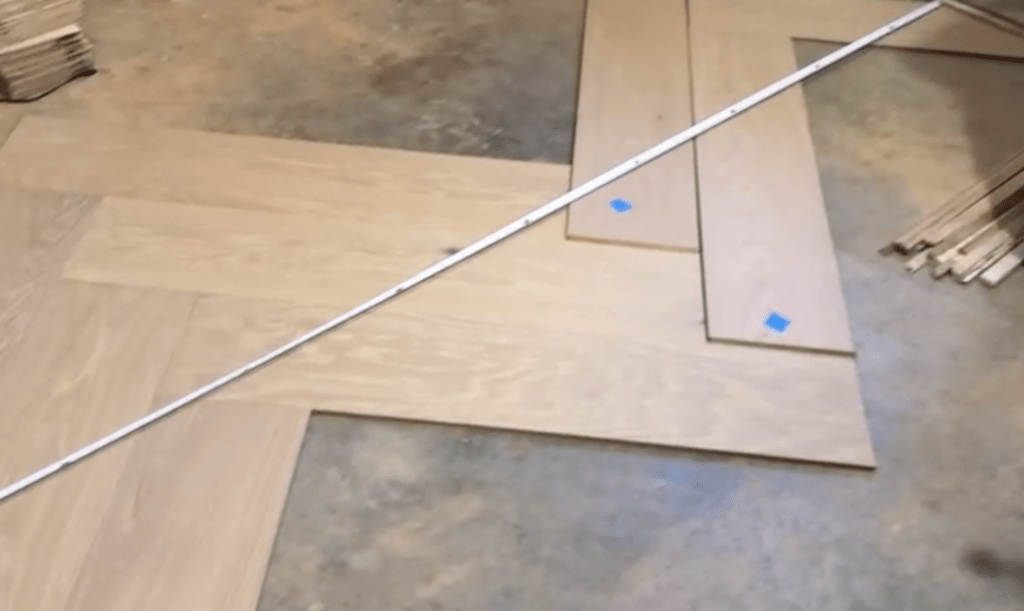
NWFA’s installation guidelines have a herringbone pattern set out dry to confirm its balance before it is installed. With fabricated pieces, that step also checks the fabrication: in Monroe, the herringbone and border pieces were set out dry in a workshop mock-up, which confirmed the proportions, the tongue-and-groove fit and the bevel line between the field and the border. Fabricating the 130-square-foot Dunwoody entrance took one day in the shop, and installing it one day on site, with a crew of two.
Installing fabricated herringbone
Fabricated herringbone is installed the way NWFA’s installation guidelines set out every herringbone floor, which they class as a parquet pattern. The layout starts from working lines through the center of the space, the first pieces are set out dry to confirm the pattern is balanced, and the subfloor has to be flat to 3/16 inch in 10 feet or 1/8 inch in 6 feet, unless the flooring manufacturer specifies otherwise. In Monroe, the field was set at 45 degrees, working outward from a green-laser center line, on a concrete slab that measured within that tolerance.
The adhesive follows the subfloor. Over the Monroe slab, the herringbone was glued down in WAKOL MS 260. Over plywood, the Dunwoody and Woodstock herringbone was installed as a nail-assisted glue-down, where the adhesive is the primary bond and fasteners hold each piece while it cures; NWFA treats the fasteners in this method as a supplement to the adhesive and sets no nailing schedule for them. Dunwoody was installed in MAPEI Ultrabond ECO 980, and the Woodstock catwalk and upstairs hallway in MAPEI Ultrabond ECO 995. Because the flooring is prefinished, its factory finish remains the floor’s finish once the herringbone is installed.
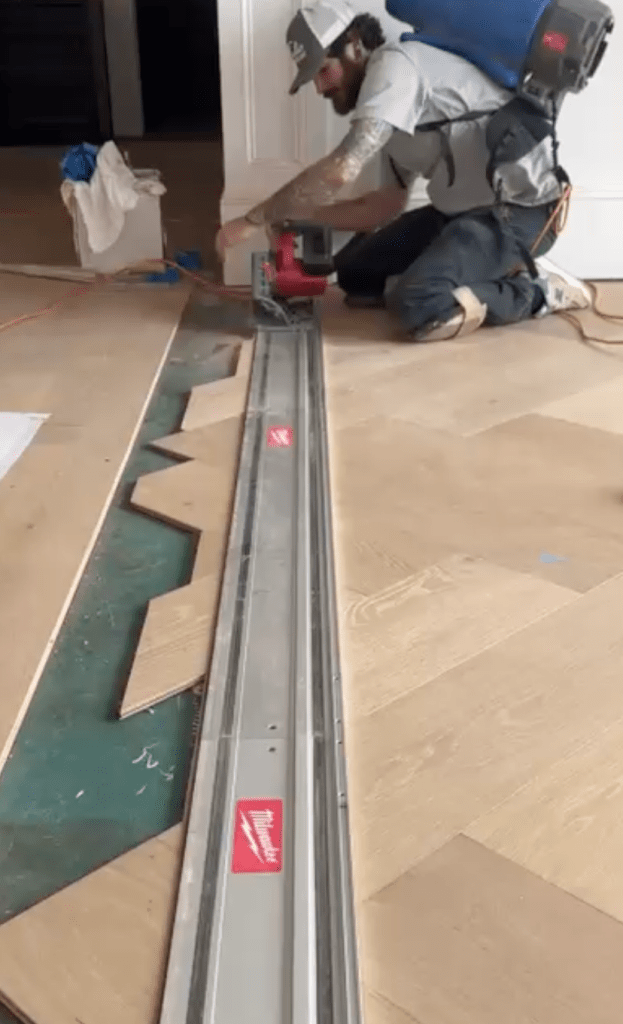
Where the herringbone meets a border, NWFA’s ornamental floor guidelines have the field installed past the border line and cut back to it against a straightedge. In Monroe, the cured field was cut back with a track saw and a groove was routed into the cut edge to take the tongue of the border boards: a single board width of the same plank around a 60-linear-foot perimeter, with the corners butt-joined at the client’s request. The tongue-and-groove joint holds the field and the border at the same height as the floor moves with the seasons. Joining a shop-fabricated field to its border this way is our own method. In Dunwoody, a border fabricated from the same plank joins the herringbone to the home’s straight-run floor, and in Woodstock, solid brass inlay is set flush between the herringbone and its border.

What size herringbone is best?
The size to choose is the one in proportion to the room, and we judge it by setting the pieces out at full size before the floor is installed. The width of a piece sets the scale of the pattern, and its length sets how far each step of the zigzag runs. On the 24th floor of a Buckhead high-rise, with solid white oak made for the pattern, we set out 5-by-20-inch and 5-by-25-inch pieces at full scale in the rooms. Against high ceilings and modest room footprints, the longer pieces read coarse, and the 20-inch length was chosen with the owners so the pattern would feel balanced in the space; the 5-inch width was set by the unit’s narrow entrance hallway.
With fabricated herringbone, the plank sets the width: each piece is either the plank’s full width or about half of it, after the saw cut and the new tongue and groove, and the length is cut to suit the space. In Dunwoody, the builder’s 9-inch plank gave 4¼-inch pieces for a 130-square-foot entrance. In Woodstock, the 9½-inch plank gave 4½-inch pieces, cut to 25 inches for the 150-square-foot catwalk and 19 inches for the 182-square-foot upstairs hallway. In Monroe, the pieces kept the full 9½-inch width at 48 inches long, in a dining room of about 180 square feet including the border.
Client review
Our Monroe client wrote about the floor, including the herringbone we fabricated for the dining room.
★★★★★ 5-star review — Source: Google Business Profile
“Another masterpiece by Classy Flooring ATL. Just finished installing about 5,000 Sf. of engineered white oak flooring. Classy did an excellent job incorporating a herringbone design in the dinning room to break up the floor. I highly recommend this group and do not see myself entertaining any other company. Quality, cleanliness and attention to details speak for itself. Thank you again Classy Flooring ATL. for surpassing all expectations.”
— Steven Steven, Monroe
Our hardwood flooring services
A fabricated herringbone floor is one part of a larger installation, and it draws on the same services we offer across metro Atlanta and North Georgia. Each service has its own page, with the projects behind it and its price.
Custom hardwood pattern installation
Our custom hardwood pattern installation page covers herringbone, chevron and custom borders, whether the pieces are made at the factory or fabricated in our shop. Its projects run from the factory-made European Ash herringbone and custom border across two Savannah penthouse residences to about 1,500 square feet of white oak herringbone with a 7-inch border on the 24th floor of a Buckhead high-rise. Custom pattern installation starts at $7.00 per square foot for projects of 1,000 sq ft and up; smaller projects are priced by the job.
Engineered and prefinished hardwood installation
Fabricated herringbone usually sits within a straight-lay floor of the same product, as in Dunwoody, Monroe and Woodstock, where the same RW Floors plank runs through both houses of the estate around the herringbone. Our engineered and prefinished hardwood installation page covers how we install that floor over concrete slabs and plywood. For projects of 1,000 sq ft and up, installation starts at $4.00 per square foot for engineered and prefinished hardwood; smaller projects are priced by the job.
Brass and metal inlay
Brass can frame a herringbone field where it meets its border. On the Woodstock estate, 214 linear feet of solid C360 brass were set flush into routed channels, outlining both herringbone fields and running across 15 doorway thresholds. Our brass and metal inlay page covers the metal, how it is set and how it is priced.
Subfloor preparation
NWFA holds herringbone, as a parquet pattern, to the flatness tolerance given above, so the subfloor is checked and corrected before the pieces are installed. Our subfloor preparation page covers how we prepare slabs and plywood for hardwood and how that work is priced. Subfloor correction is priced according to the condition of the subfloor, up to $4.00 per square foot; self-leveling compound, where the floor needs it, is $110 per bag, material and labor included.
Our Services page lists every service with its price, and our Gallery shows finished herringbone floors from our projects.
Plan your herringbone floor
Have a hardwood floor in mind that is sold only as straight planks, or already installed in the rest of your house? Tell us the product name, the room and the pattern you have in mind through our contact form; we typically reply within one business day.