Classy Flooring ATL

Prefinished Engineered White Oak Installation in Canton, GA

Project Overview

This project involved the installation of 2,740 square feet of prefinished engineered European white oak across both levels of a new-construction single-family home in Canton, Georgia. The floor is RW Floors Kells from the Killarney Collection — 7-1/2″ wide plank, 1/2″ thick, in random lengths from one to seven feet — installed over a plywood subfloor using a glue-assist nail-down method. The work was coordinated with the builder and the general contractor during the final phase of construction.

Project type: Prefinished engineered hardwood installation

Location: New-construction single-family home, Canton, Georgia

Scope: 2,740 square feet across two levels, powder room included, full bathrooms not in scope, stairs not in scope

Year: 2026

The Material

Species: European White Oak

Manufacturer: RW Floors (Real Wood Floors)

Collection: Killarney

Product name: Kells

Construction: Multi-ply engineered hardwood

Wear layer: 2mm, sliced-cut veneer

Thickness: 1/2″

Width: 7-1/2″

Length: Random, 1–7 feet

Milling: Tongue and groove

Finish: Factory urethane, pigmented

Texture: Wire-brushed

Certifications: CARB-II, GreenGuard Gold, TSCA

Warranty: 50-year residential, 3-year light commercial

Approved installation methods (per RW Floors): Float, glue down, nail, staple

Kells reads as a light neutral with sandy undertones, which allowed the floor to work across every room in the open plan without competing with cabinet, wall, or trim selections. At 7-1/2″ wide in random lengths up to seven feet, the plank size fit the scale of the home and held up cleanly along the long sight lines between rooms. The multi-ply engineered construction and 2mm sliced-cut wear layer are appropriate for wide-plank European white oak at this thickness — the multi-ply core is designed to support dimensional stability in engineered hardwood applications, including approved glue-down and nail-down installations over suitable plywood substrates, and the factory urethane wear layer may allow future recoating when the finish shows traffic wear, depending on condition and manufacturer guidance.

RW Floors lists float, glue down, nail, and staple as the approved installation methods for this product. The glue-assist nail-down method used on this project combines two of those approved methods.

Why Prefinished on This Project

The homeowner and builder selected a prefinished product for this home. Prefinished engineered hardwood arrives with the factory urethane wear layer already applied, which means no sanding, staining, or finish application is performed on site. The floor is installed and the home is ready for move-in as soon as the adhesive has cured and the perimeter trim is in.

For a new-construction single-family home coordinated around a move-in date, that timeline fits cleanly with the other trades. There is no site-finishing dust phase, no finish cure schedule to hold the home open for, and no coordination loss with the painter and trim carpenter around finished floors.

What the choice does not remove is the discipline. With no site finishing, the quality of the finished result depends entirely on what happens before and during installation — moisture control on the wood and the subfloor, the condition of the plywood under the glue, the board-blending discipline on wide-plank European white oak, the adhesive bead and trowel behavior, and the fastening sequence. Every step below documents how those were handled on this Canton project.

How This Project Was Executed

  1. Verified moisture readings on the flooring and on the plywood subfloor
  2. Drove unseated screws flush into the plywood across both levels
  3. Scraped dried drywall compound off the plywood and vacuumed
  4. Detailed plywood sheet edges at seams
  5. Checked flatness with a 10-foot straightedge; corrected small high spots by sanding the plywood
  6. Applied one coat of Wakol PU 280 across the prepared plywood
  7. Blended boards from multiple open boxes and racked the layout
  8. Installed the flooring with Bona R851 adhesive and 18-gauge cleats — glue-assist nail-down
  9. Installed white primed quarter round along the perimeter
  10. Cleaned the site at the end of each day and at project completion

Wood Acclimation and Moisture Verification

RW Floors delivered the Kells flooring to the home, and the builder held the product inside the conditioned living space with HVAC running before Classy Flooring ATL arrived. Acclimation inside the conditioned home, rather than in a garage or an unconditioned staging area, is the approach NWFA guidelines specify for engineered plank of this width and thickness.

Before the first box was opened for layout, moisture readings were recorded on both the flooring and the plywood subfloor.

Flooring moisture content: 5.5%

Plywood subfloor moisture content: 6.0%

Delta between flooring and subfloor: 0.5%

NWFA installation guidelines call for the moisture content of the flooring and the wood subfloor to be in a tight range before installation — typically within 2% for plank 3 inches and wider, with tighter tolerances preferred for wide-plank product. A 0.5% delta at the wider end of engineered plank sits well inside that range, and the numbers were recorded before material was cut.

For the broader technical detail on subfloor evaluation, plywood and concrete substrate preparation, flatness, and moisture control before hardwood installation, see Subfloor Preparation for Hardwood Installation in Atlanta.

Plywood Subfloor Preparation

Plywood preparation was where the structure of this project was set. Every step below happened before the first plank was racked.

Fastener correction. The crew walked both levels and drove every loose screw flush into the plywood. Screws that sit proud of the subfloor surface create localized high spots that telegraph through a 1/2″ engineered plank. They can also work loose over time and contribute to squeak. Driving them flush at the start removed both issues.

Drywall compound removal. Dried drywall compound had been dropped and tracked across large areas of the plywood during trim and paint phases. Compound that remains on the subfloor sits between the plywood and the adhesive, and the adhesive cannot bond to the compound layer. The compound was scraped off the plywood by hand, section by section, across both levels. The full subfloor was then vacuumed.

Edge detailing. At every seam where plywood sheets met, the edges were cleaned and smoothed so the boards would sit flat across the transition.

Flatness correction. After the straightedge walk-through, small high spots were corrected by sanding the plywood surface directly — removing the material that was driving the high reading rather than masking it with a leveler. The surface was then vacuumed again.

Final cleaning. A final vacuum pass was made across both levels before any substrate primer was applied.

Classy Flooring ATL installer using an edge sander to feather the seams between plywood sheets during subfloor preparation in a Canton, GA home
Edge-sanding the plywood sheet seams to feather transitions before the flatness check and primer application.
Classy Flooring ATL installer edge-sanding a plywood sheet seam during subfloor preparation in a Canton, GA home, with RW Floors Kells flooring cartons staged against the wall
Edge-sanding the plywood seams with RW Floors Kells flooring cartons already on site for acclimation.
Classy Flooring ATL installer edge-sanding a plywood sheet seam during subfloor preparation in a Canton, GA home, with RW Floors Kells flooring cartons staged against the wall
Edge-sanding the plywood seams to feather transitions across sheet joints before primer.
Rotary floor buffer positioned on the plywood subfloor in a bedroom in a Canton, GA home during spot-sanding of high points and removal of dried drywall compound
Rotary buffer in an upper-level bedroom knocking down plywood high points and dried drywall compound during subfloor prep.
Rotary floor buffer on bare plywood subfloor during Canton, GA subfloor preparation, used to spot-sand high points and remove dried drywall compound
Rotary buffer used to spot-sand high points and knock down dried drywall compound on the plywood subfloor during prep.
Rotary floor buffer being operated on bare plywood subfloor in a Canton, GA home during spot-sanding of high points and removal of dried drywall compound
Rotary buffer in use on the plywood deck to knock down high points and work off remaining drywall compound.

Substrate Primer — Wakol PU 280

After the plywood was prepared, one coat of Wakol PU 280 was applied across the full 2,740 square feet.

The Wakol PU 280 Technical Data Sheet defines two different application protocols based on substrate. On concrete, two coats are used to block moisture at defined levels — up to 18 lbs/1000 sq ft/24 hours or up to 98% RH, depending on the reading. On wood subfloors, including plywood, the TDS specifies a single-coat application as a substrate primer and moisture retarder, and explicitly states that two coats should not be applied to wood substrates.

The single coat on this Canton project is that wood-substrate application. It was rolled onto the prepared plywood with a Loba micro-fiber roller, in a thin and even layer without puddling or dry spots, and allowed to cure before adhesive work began.

Wakol PU 280 Moisture Barrier substrate primer container on the plywood subfloor in a Canton, GA home, with primed and unprimed plywood visible behind it
Wakol PU 280 Moisture Barrier container on the plywood deck, with the primed area visible alongside the unprimed section.
Wakol PU 280 substrate primer container next to the Loba micro-fiber roller on the plywood subfloor in a Canton, GA home, with the primed area visible alongside unprimed plywood
Wakol PU 280 container and Loba micro-fiber roller on the plywood deck, showing primed plywood next to an unprimed section.
Wakol PU 280 substrate primer being rolled onto the plywood subfloor with a Loba micro-fiber roller in a Canton, GA new-construction home
Rolling one coat of Wakol PU 280 onto the prepared plywood subfloor with a Loba micro-fiber roller.
Upper-level bedroom plywood subfloor in Canton, GA new-construction home after Wakol PU 280 primer application, viewed from doorway with two windows on the far wall
Primed plywood subfloor in an upper-level bedroom after one coat of Wakol PU 280, ready for the Bona R851 adhesive bed and prefinished European white oak.
Upper-level bedroom plywood subfloor in Canton, GA new-construction home after Wakol PU 280 primer application, window on right and dormer ceiling at left
Upper-level bedroom plywood subfloor after one coat of Wakol PU 280, following screw set, scraping, edge detailing, flatness correction, and final vacuum.
Plywood subfloor in Canton, GA new-construction home after Wakol PU 280 primer application, viewed through interior doorway with stair newel post at left
Plywood subfloor across the main level after one coat of Wakol PU 280, rolled with a Loba micro-fiber roller following flatness correction and final vacuum.

Board Blending and Layout

Before adhesive work started, the crew opened several boxes of the Kells flooring simultaneously and laid planks out across the installation area. Wide-plank European white oak in random lengths will show natural variation in grain and tone from board to board. Opening one box at a time produces visible clusters of similar boards in the finished floor.

Boards from multiple open boxes were racked together and shuffled so that tone, length, and grain variation were distributed across the entire floor rather than concentrated in any one area. End-joint staggering was maintained so no short run of joints lined up across adjacent courses.

For a 7-1/2″ plank width in an open-plan home with long sight lines, the blending step is what holds the floor visually across rooms. No single area reads as darker, lighter, more figured, or more plain than another.

Installation — Glue-Assist Nail-Down

The installation method was glue-assist nail-down. Both the adhesive bond and the mechanical fastener hold the floor. This method gives the floor both adhesive contact and mechanical hold, which is especially useful for wide-plank engineered hardwood over plywood.

Adhesive. Bona R851 was troweled onto the prepared plywood with a 1/4″ × 1/4″ × 1/4″ V-notch trowel. The trowel profile regulates the bead height and the rate of adhesive transfer to the back of each board so that the adhesive makes continuous contact across the plank footprint.

Fastening. Each board was set into the wet adhesive and then fastened with 1-1/2″ 18-gauge cleats spaced 6–8 inches on center. The cleats hold the plank down to the plywood while the adhesive cures and prevent movement at the tongue-and-groove joint during the hours immediately after installation.

Sequence. Boards were installed in working sections across both levels. Adhesive was troweled ahead of the board line in manageable areas so that every plank was set into wet adhesive — not onto adhesive that had started to skin. A three-person crew held that sequence across 2,740 square feet in four working days without holding over sections of cured adhesive.

Classy Flooring ATL installer setting a row of RW Floors Kells European white oak flooring near the stone fireplace and white built-ins in a Canton, GA home
Classy Flooring ATL installer setting a row of RW Floors Kells European white oak near the stone fireplace hearth during the Canton install.
Two Classy Flooring ATL installers setting the starting rows of RW Floors Kells European white oak in a Canton, GA home, working on the Wakol PU 280 primed plywood subfloor with loose planks staged nearby
Classy Flooring ATL installers setting the starting rows of RW Floors Kells European white oak on the Wakol PU 280 primed plywood deck.
Upper-level bedroom in Canton, GA during RW Floors Kells European white oak installation, with installed planks in the foreground, loose boards staged for blending mid-room, and primed plywood subfloor at the window wall
Loose planks laid out mid-room for board blending across color and grain before each row is set in the Bona R851 adhesive bed and fastened.
Prefinished European white oak flooring installation in progress in a Canton, GA home, showing installed RW Floors Kells planks in a hallway with a primed plywood subfloor visible in the adjacent room
Installation in progress: RW Floors Kells 7-1/2″ European white oak laid in the hallway, with the adjacent room still showing the Wakol PU 280 primed plywood deck.

Quarter Round and Perimeter Finish

Classy Flooring ATL installed white primed quarter round along the perimeter of the flooring across both levels. The quarter round closes the expansion gap at the base of the wall — the gap is required to allow the wood to respond to seasonal humidity changes — and it does so without disturbing the pre-installed baseboard.

Finish paint on the quarter round is handled by the project painter as part of the builder’s trim scope.

The Result

The finished installation is 2,740 square feet of RW Floors Kells engineered European white oak across both levels of a new-construction Canton home. Tone and grain variation read as distributed across the floor rather than clustered, the 7-1/2″ plank width holds up cleanly along the long sight lines of the open plan, and the transitions between rooms read as one continuous surface.

Finished RW Floors Kells European white oak flooring in a great room in Canton, GA, with a coffered ceiling, stone fireplace flanked by white built-ins, and a wall of windows at the far end
RW Floors Kells 7-1/2″ European white oak running the full length of the great room beneath a coffered ceiling and past the stone fireplace and built-ins.
Finished RW Floors Kells European white oak flooring across the main level of a Canton, GA home, showing the living area with a wall of windows on the left and the kitchen with sage green island on the right
RW Floors Kells 7-1/2″ European white oak running from the living area into the kitchen, passing through the column opening without a transition.
Finished RW Floors Kells European white oak flooring in a living room in Canton, GA, with board-and-batten wainscoting on the walls and windows casting sunlight across the wire-brushed planks
Completed living room with RW Floors Kells European white oak running parallel to the window wall, set below board-and-batten wainscoting.
Finished RW Floors Kells European white oak flooring covering the full floor of a bedroom in Canton, GA, with sunlight falling across the wire-brushed planks near a doorway
Completed bedroom with RW Floors Kells European white oak running wall to wall, with consistent blending across color and grain.
Finished RW Floors Kells European white oak flooring running down a hallway in a Canton, GA home, passing a stair landing on the right and continuing toward a bedroom doorway at the end
RW Floors Kells 7-1/2″ European white oak running the length of the main hallway, carried across the stair landing without a break.
Finished RW Floors Kells European white oak flooring in a bedroom in Canton, GA, viewed from the doorway with sunlight falling across 7-1/2″ wire-brushed planks and a window on the far wall
Completed bedroom with RW Floors Kells 7-1/2″ European white oak showing consistent board direction and blending from the doorway through to the window wall.
Finished RW Floors Kells European white oak flooring in a living room in Canton, GA, with a stone fireplace and white built-in cabinets and shelving along the back wall
Completed living room with RW Floors Kells 7-1/2″ European white oak running across the room and continuing under the built-in cabinetry flanking the stone fireplace.
Finished RW Floors Kells European white oak flooring in a large bedroom in Canton, GA, viewed from the doorway with two windows on the far wall and an interior door to the right
Completed bedroom with RW Floors Kells 7-1/2″ European white oak running unbroken from the doorway across the full room.
Finished RW Floors Kells European white oak flooring in a bedroom in Canton, GA, showing 7-1/2″ wire-brushed planks in random lengths running across the room with a window and shiplap wall in the background
Completed bedroom floor showing RW Floors Kells random-length European white oak planks blended across color and grain.
Finished RW Floors Kells European white oak flooring in a Canton, GA kitchen, viewed from above with a sage green island base in the foreground and white perimeter cabinetry along the back wall
RW Floors Kells 7-1/2″ European white oak running continuously across the kitchen, around the sage green island and under the white perimeter cabinets.
Finished RW Floors Kells European white oak flooring running through a kitchen in Canton, GA, with white perimeter cabinetry on the left, a sage green island base on the right, and cabinets still in mid-install
RW Floors Kells 7-1/2″ European white oak running continuously through the kitchen beneath white perimeter cabinetry and a sage green island base.
Finished RW Floors Kells European white oak flooring running through a walk-in closet in Canton, GA, with built-in white shelving and a vanity on either side
RW Floors Kells 7-1/2″ European white oak continued into the walk-in closet, carrying the same board layout through built-in shelving and vanity.
Finished RW Floors Kells European white oak flooring in a bedroom in Canton, GA, showing 7-1/2″ wire-brushed planks running across the room with natural light from a window on the left
Completed bedroom with RW Floors Kells 7-1/2″ wire-brushed European white oak, showing consistent board blending across color and grain.
Finished RW Floors Kells European white oak flooring running across the open main level of a Canton, GA home, with square columns framing the transition between the living area and kitchen
RW Floors Kells 7-1/2″ European white oak running continuously across the open main level, carrying through the column openings without a transition.

Ongoing Maintenance

The factory urethane finish on RW Floors Kells is a urethane wear layer, maintained with cleaning products formulated for urethane-finished wood — not wax, not oil soap, and not general household cleaners. The recommended routine is:

  • Dry sweep or vacuum regularly to remove grit that causes surface wear
  • Clean with a damp microfiber mop using an RW Floors-approved or compatible urethane wood cleaner — never a wet mop
  • Place felt protectors under furniture legs and use area rugs at entry points
  • Maintain indoor relative humidity between 35% and 55% year-round to minimize seasonal movement

When the urethane wear layer shows traffic wear over time, the floor may be recoated depending on condition and manufacturer guidance — the existing urethane is prepped and a new coat is applied. A full sand-and-refinish is a separate consideration and is bounded by the 2mm wear layer thickness above the tongue.

Project Specifications

DetailSpecification
SpeciesEuropean White Oak
ManufacturerRW Floors (Real Wood Floors)
CollectionKillarney
Product nameKells
ConstructionMulti-ply engineered hardwood
Wear layer2mm, sliced-cut
Thickness1/2″
Width7-1/2″
LengthRandom, 1–7 feet
MillingTongue and groove
Factory finishUrethane, pigmented
TextureWire-brushed
CertificationsCARB-II, GreenGuard Gold, TSCA
Warranty50-year residential, 3-year light commercial
SubfloorPlywood
Flooring MC at install5.5%
Plywood MC at install6.0%
Substrate primerWakol PU 280 — one coat, wood-substrate application
AdhesiveBona R851
Trowel1/4″ × 1/4″ × 1/4″ V-notch
Fasteners1-1/2″ 18-gauge cleats, 6–8″ on center
Installation methodGlue-assist nail-down
Perimeter trimWhite primed quarter round
Trim finish paintHandled by project painter
Total area2,740 sq ft
CrewThree installers, Classy Flooring ATL in-house
Project typeNew construction
LocationCanton, GA
Installed byClassy Flooring ATL
 

Frequently Asked Questions

Why was the plywood subfloor prepared before installation?

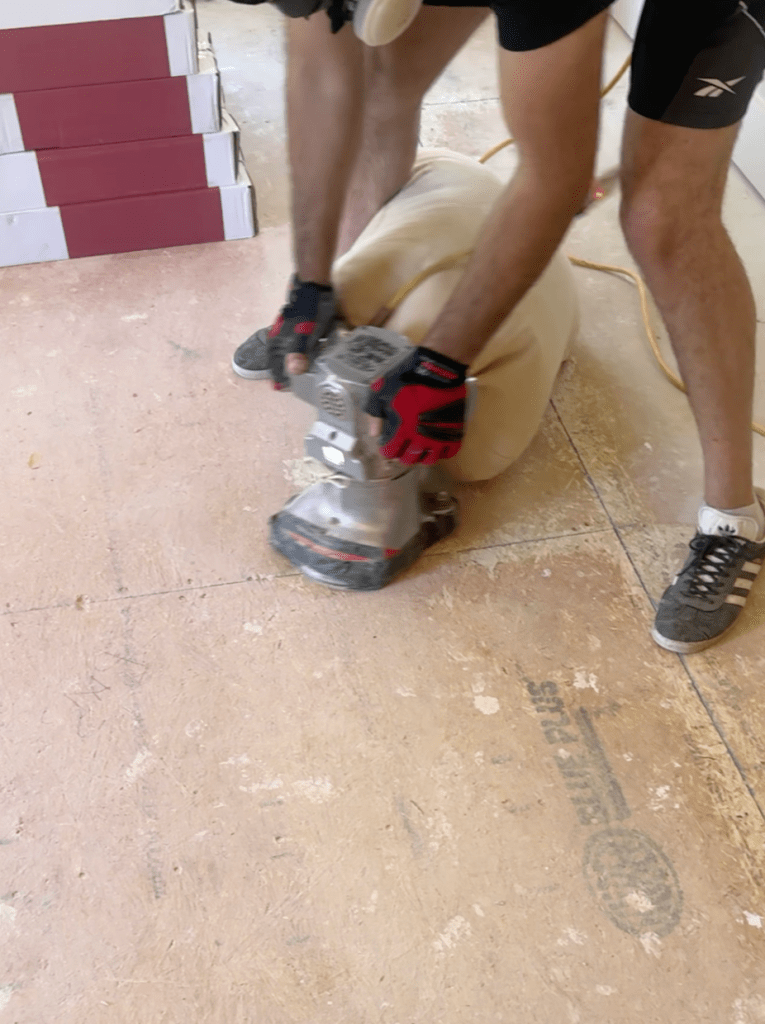
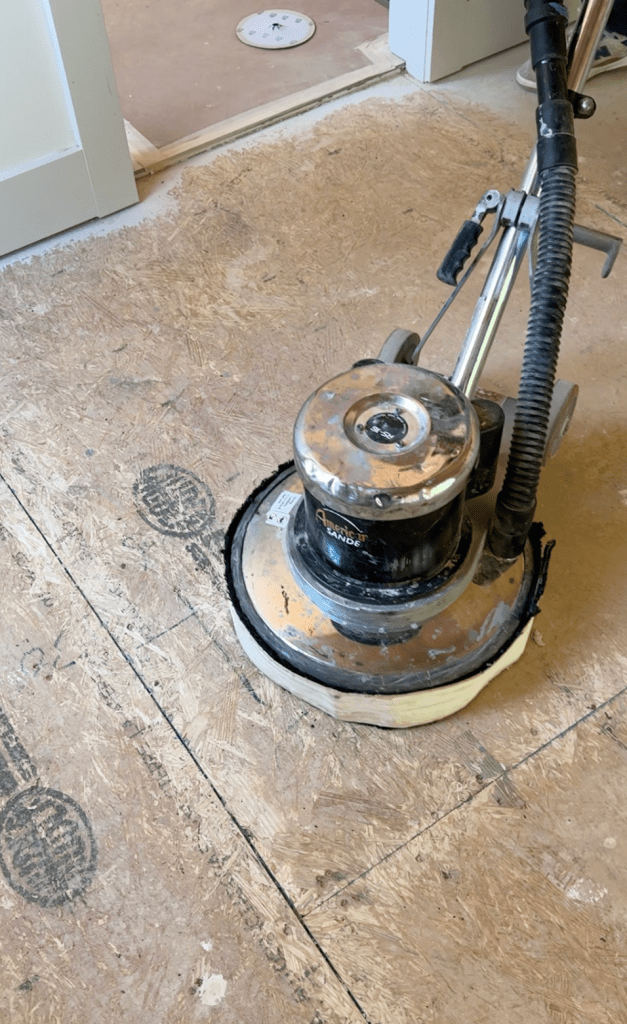
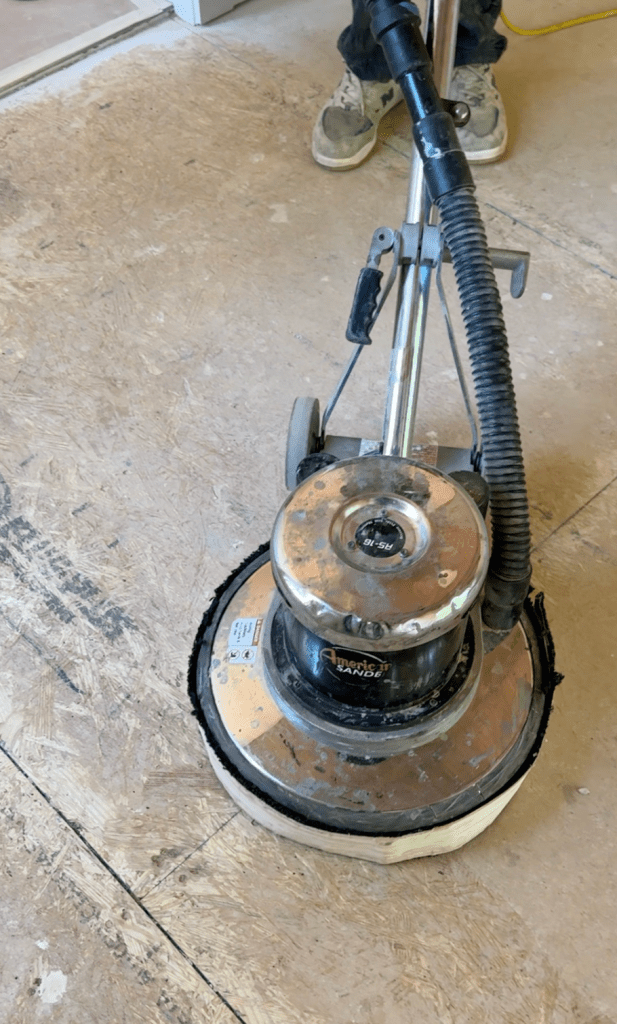
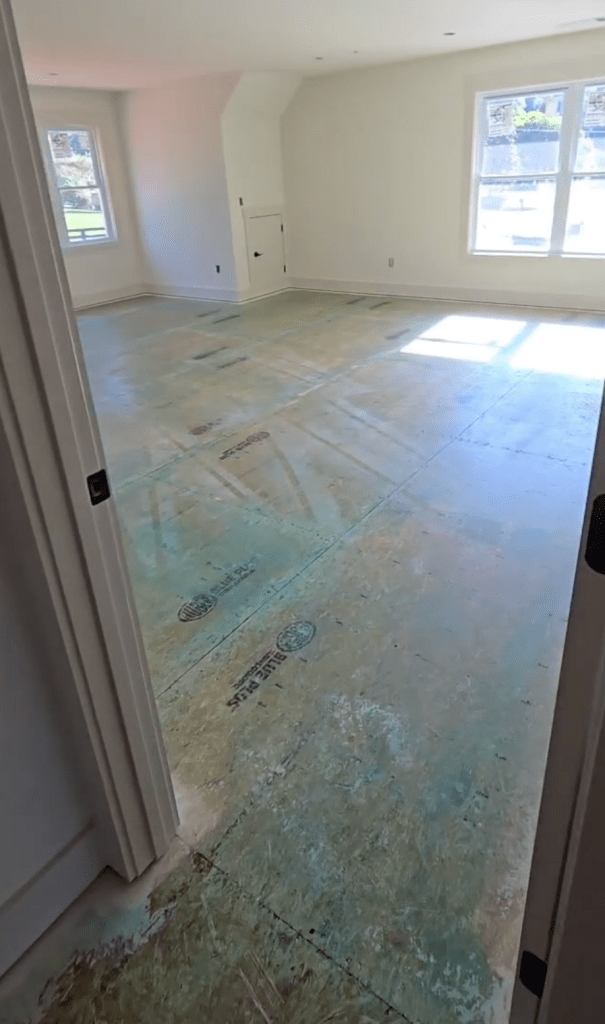
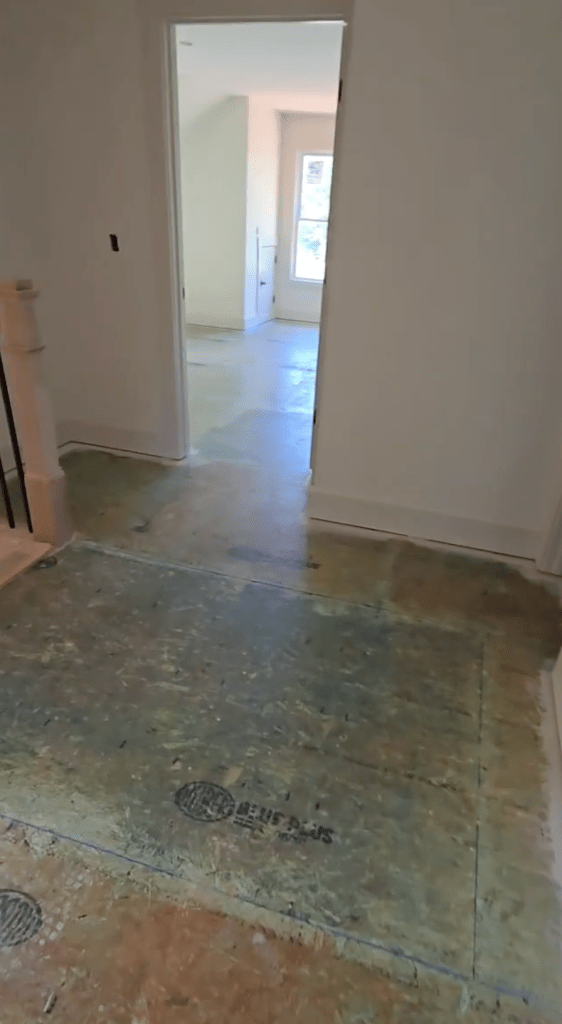
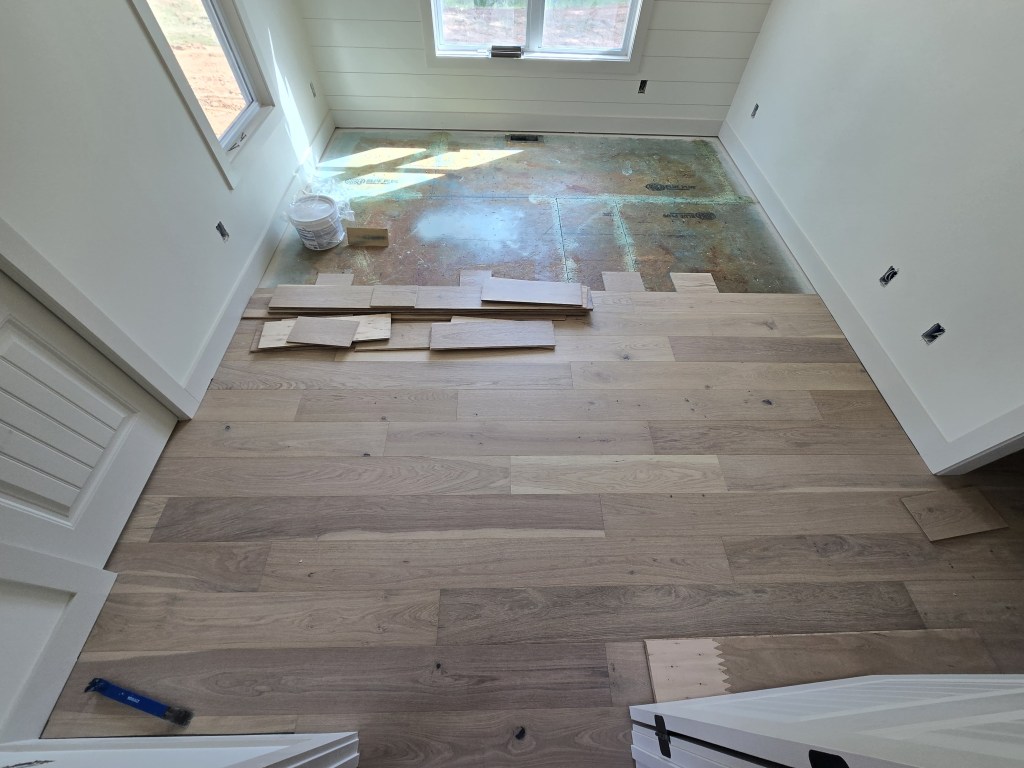
The plywood was in new-construction condition — structurally sound, but with dried drywall compound on the surface, a number of unseated screws, and small high spots at sheet edges. Each of those affects a 1/2″ engineered plank directly. Compound prevents adhesive bond to the plywood; unseated screws telegraph as high spots under the board; sheet-edge high spots prevent boards from sitting flat. The preparation steps resolved those conditions before any primer or adhesive was applied.

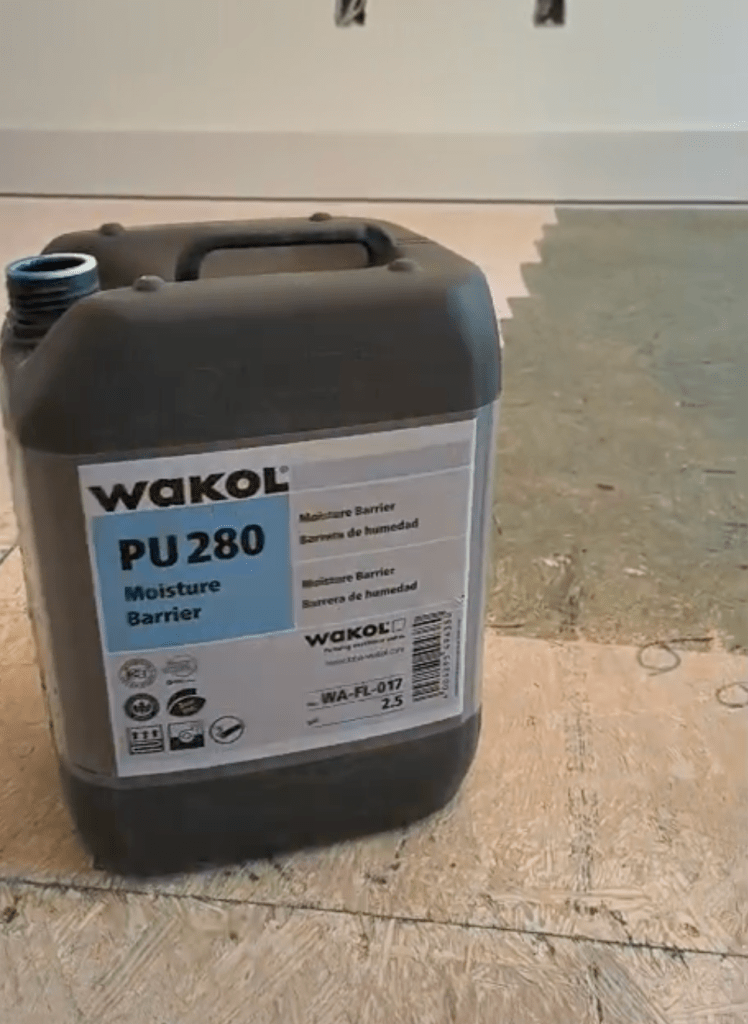
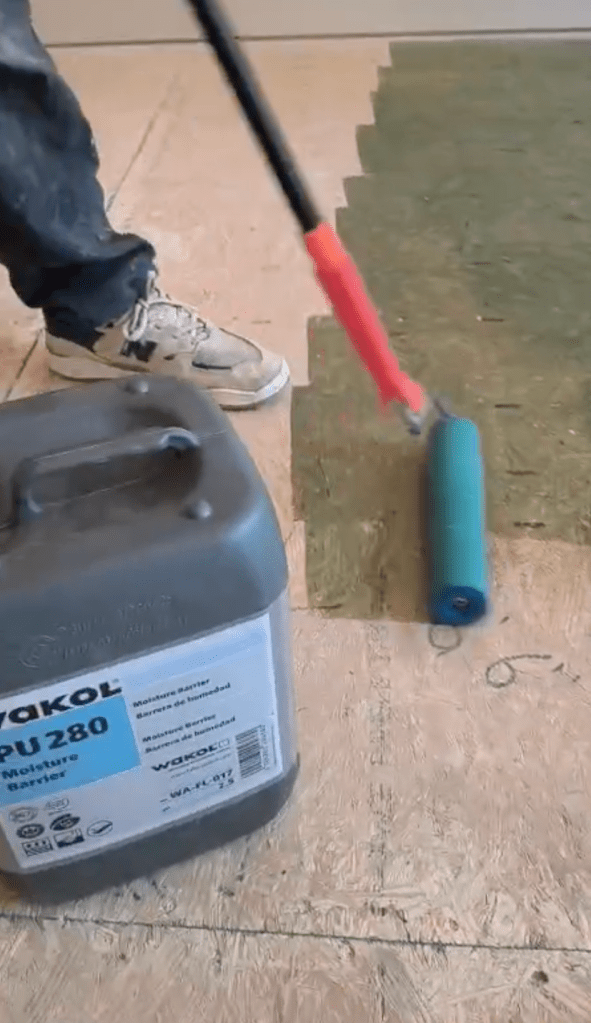
Why was one coat of Wakol PU 280 used on the plywood?

One coat is the wood-substrate application specified by the Wakol PU 280 Technical Data Sheet. On concrete, two coats are used to block moisture at defined levels. On plywood and other wood substrates, the TDS specifies a single-coat application as a substrate primer and moisture retarder and states that two coats should not be applied to wood. The single coat on this Canton project is that wood-substrate application.

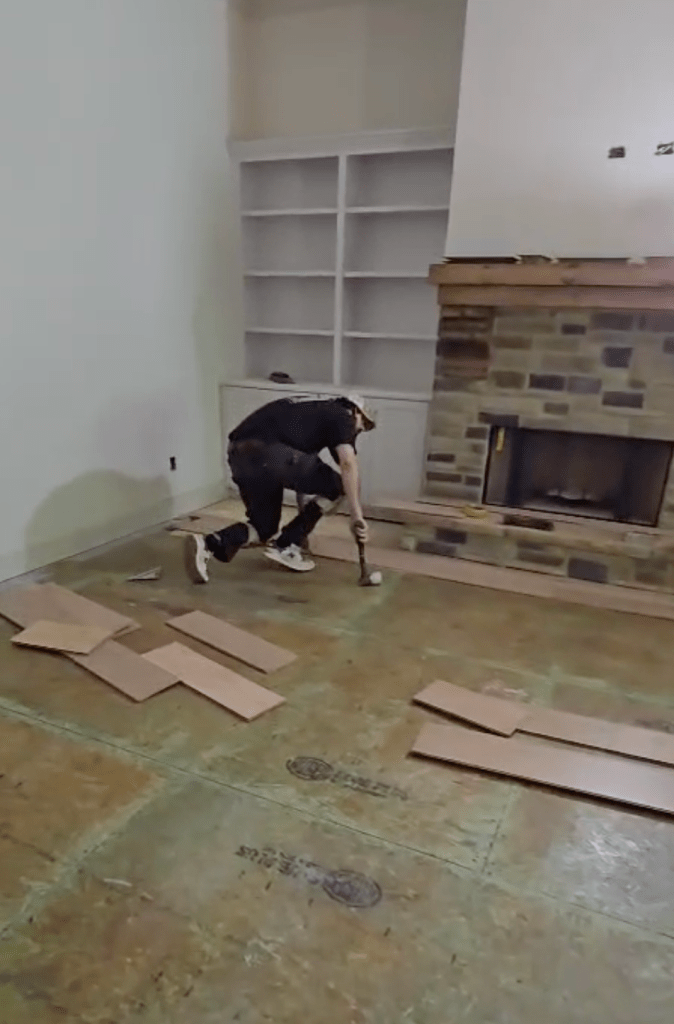
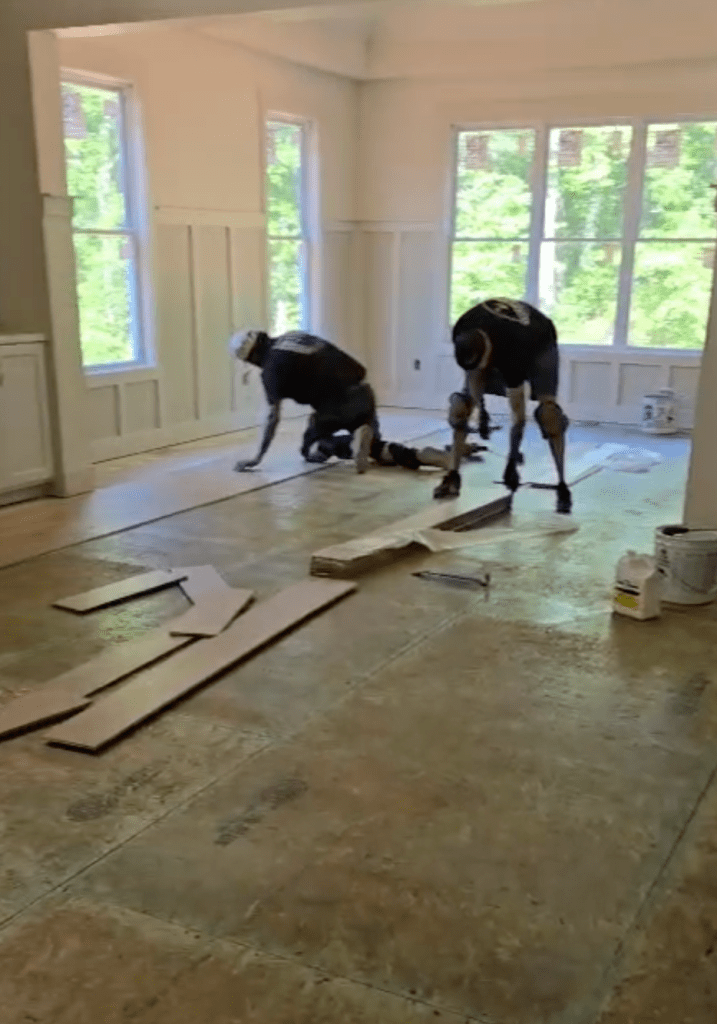
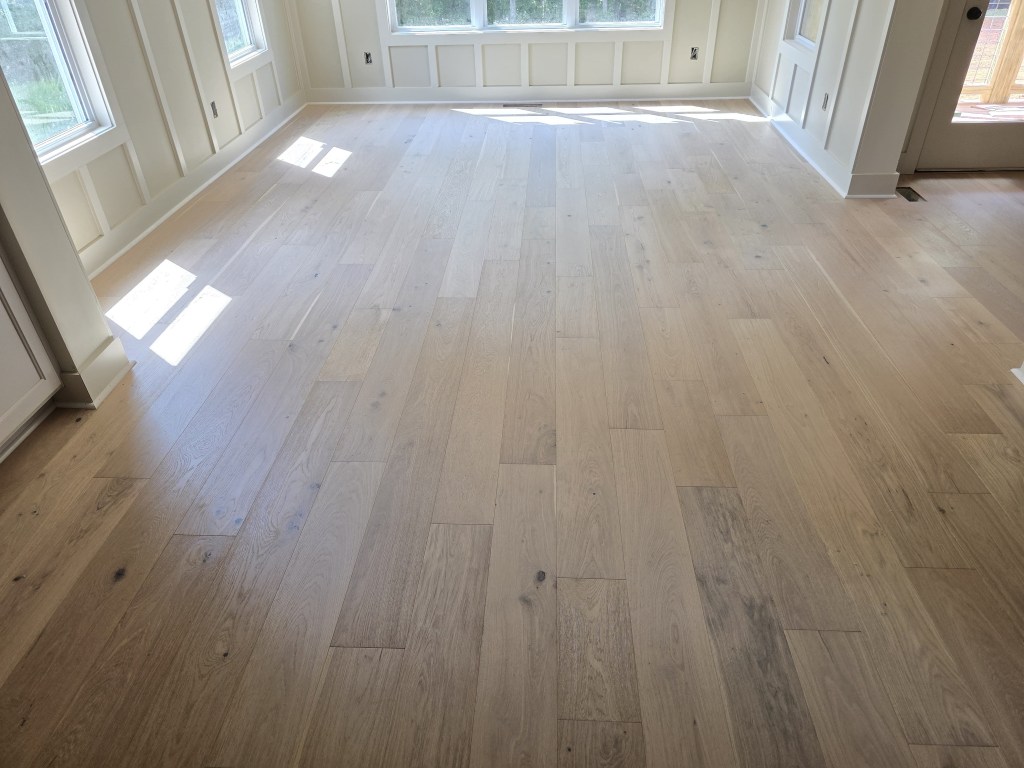
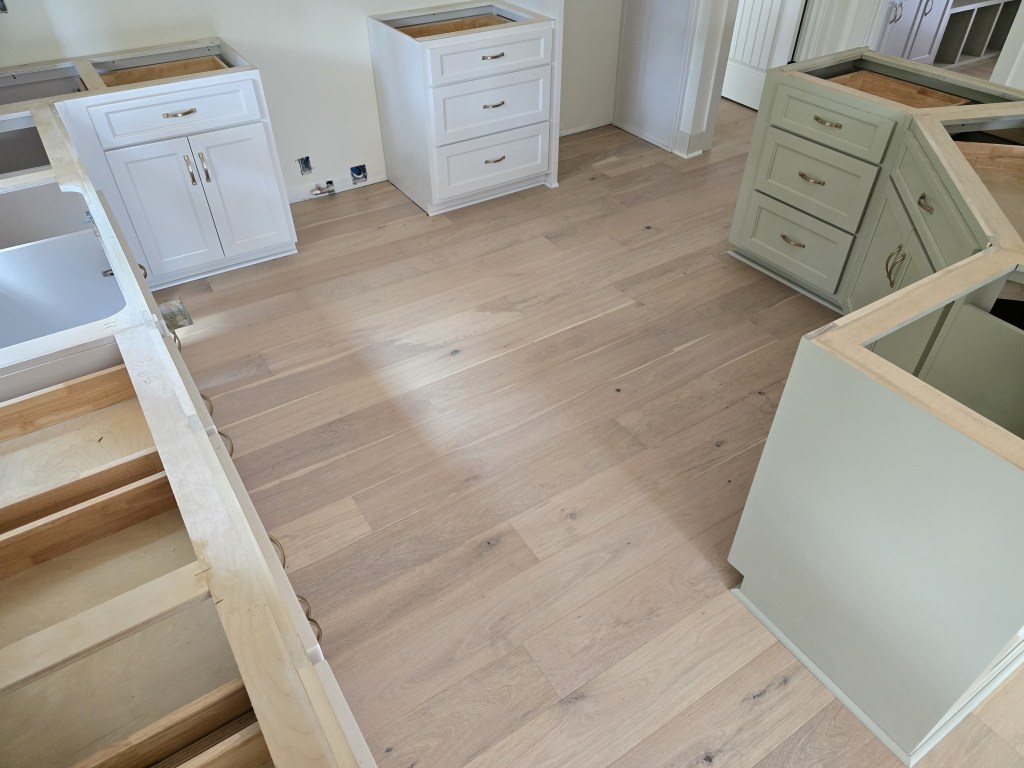
How was the prefinished engineered hardwood installed over plywood?

The method was glue-assist nail-down. Bona R851 adhesive was troweled onto the prepared plywood with a 1/4″ × 1/4″ × 1/4″ V-notch trowel, and each board was set into wet adhesive and fastened with 1-1/2″ 18-gauge cleats at 6–8 inches on center. The adhesive provides continuous contact across the plank footprint; the cleats hold the board down while the adhesive cures.

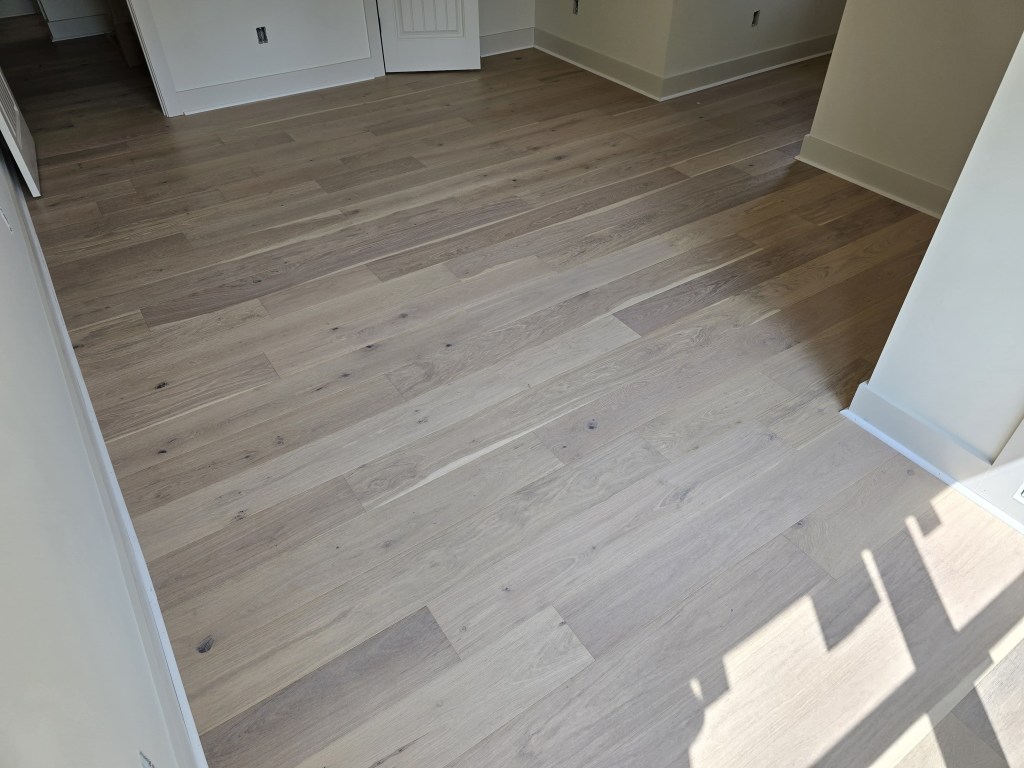
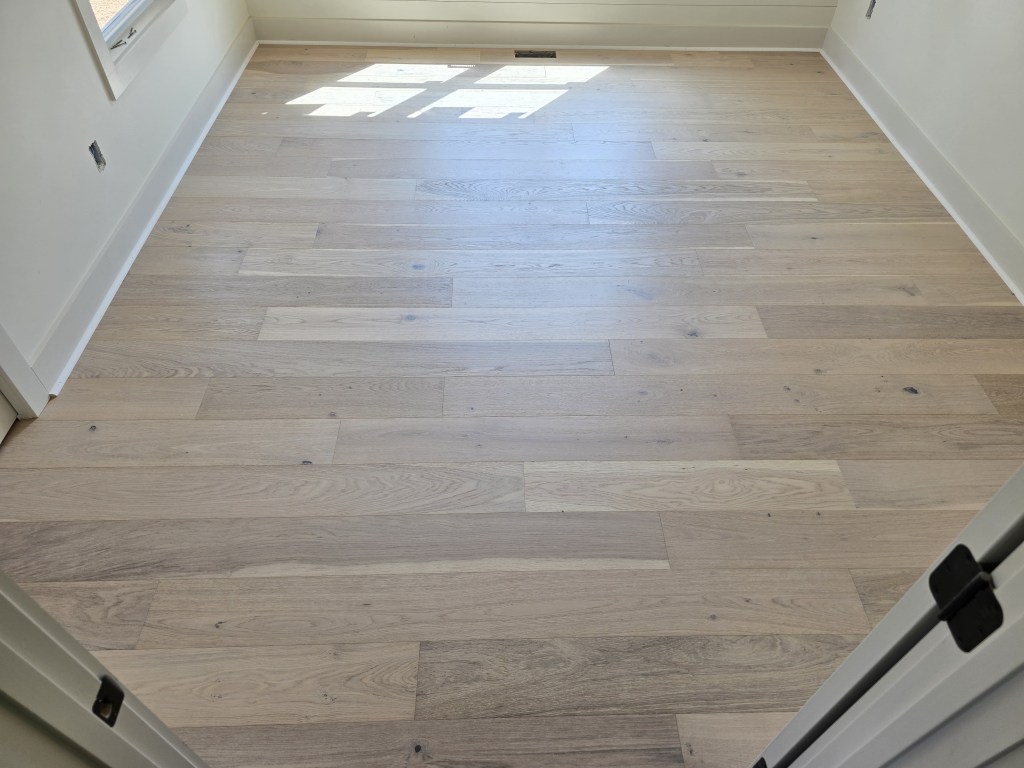
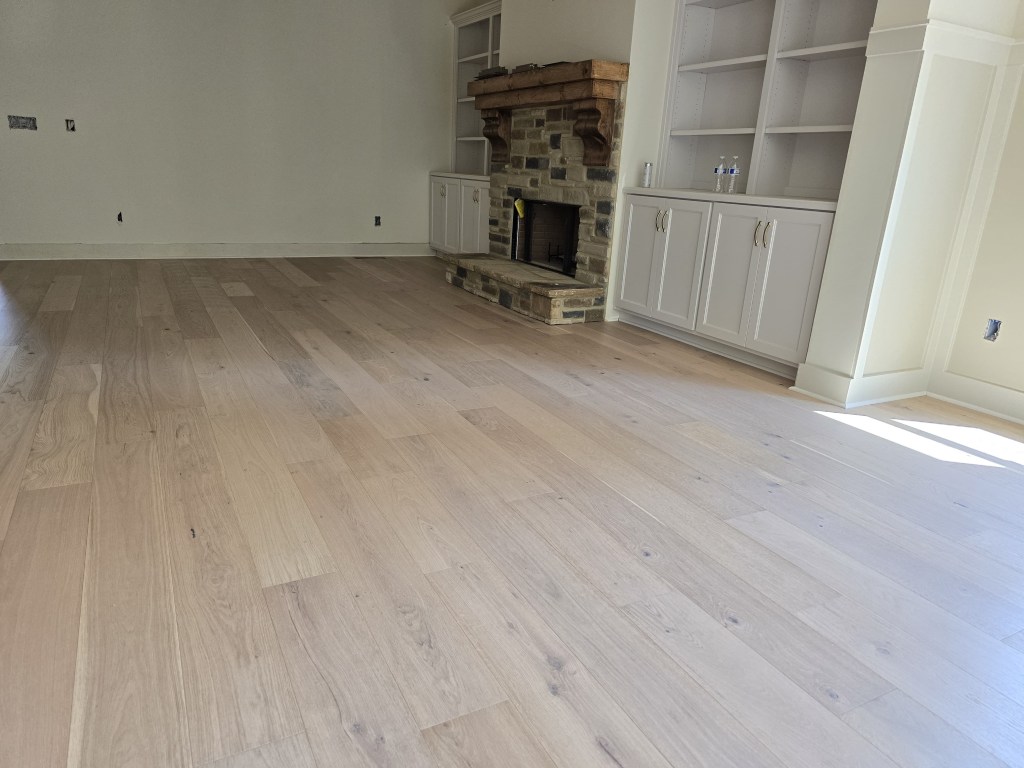
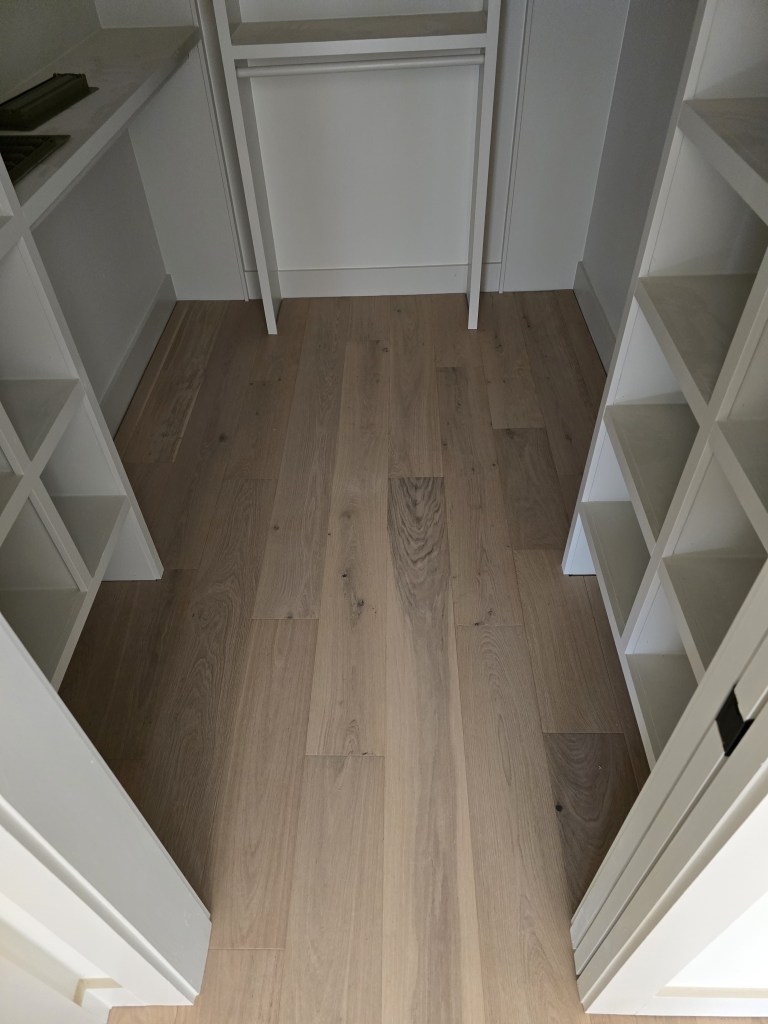
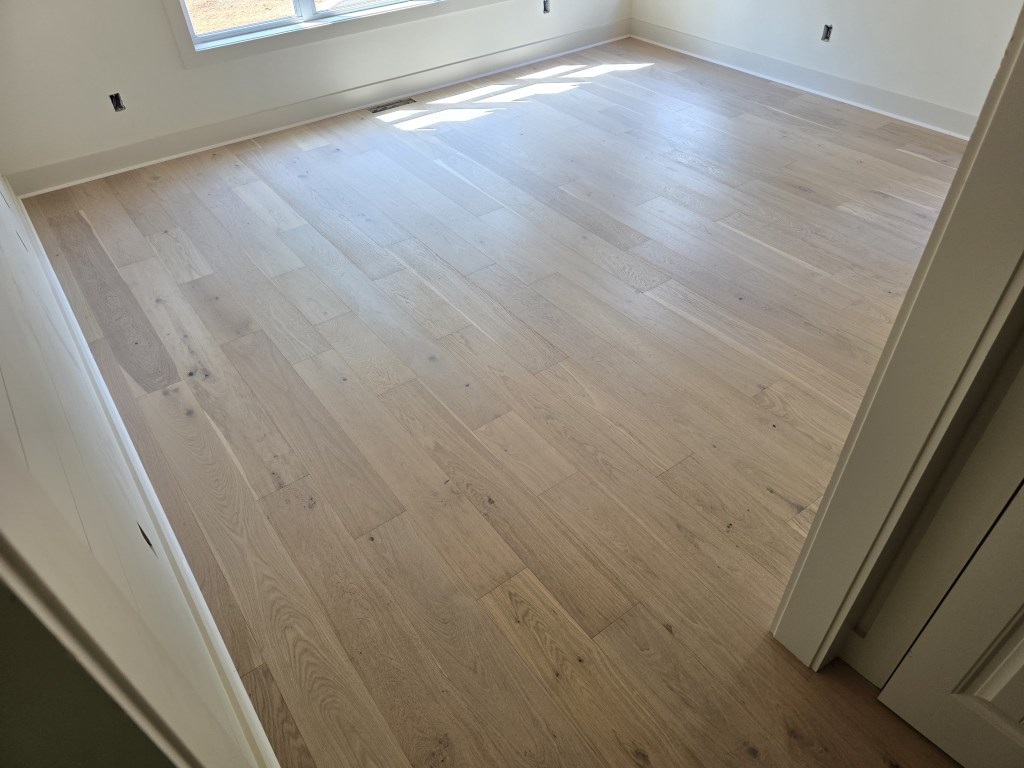
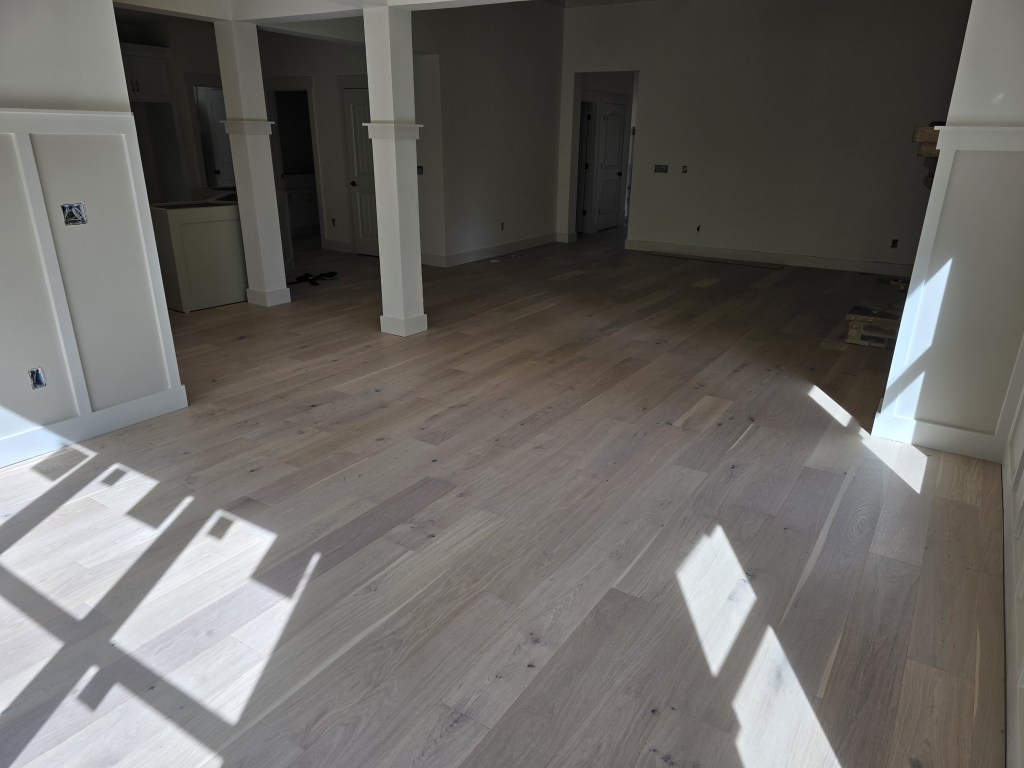
Why does board blending matter on wide-plank European white oak?

Natural variation in grain and tone across boards is part of European white oak. Installing one box at a time concentrates similar boards in the area where that box is opened, which reads as clustering in the finished floor. Opening several boxes simultaneously and racking boards across them distributes the variation across the full installation — so no area of the home reads as visually different from the rest.

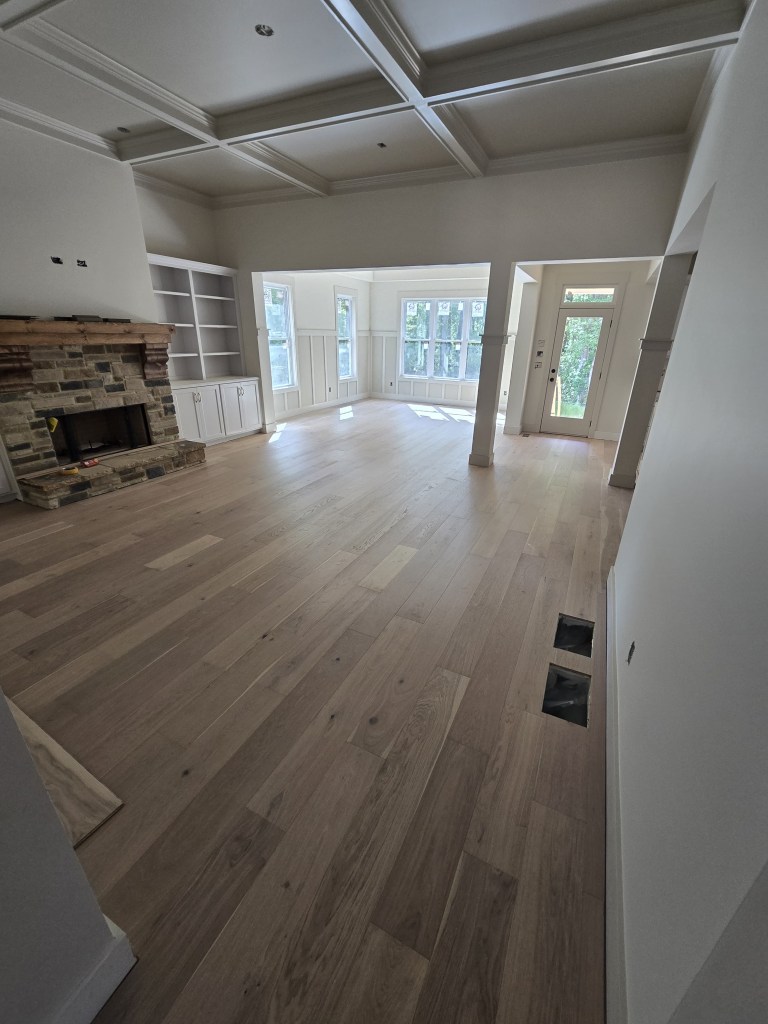
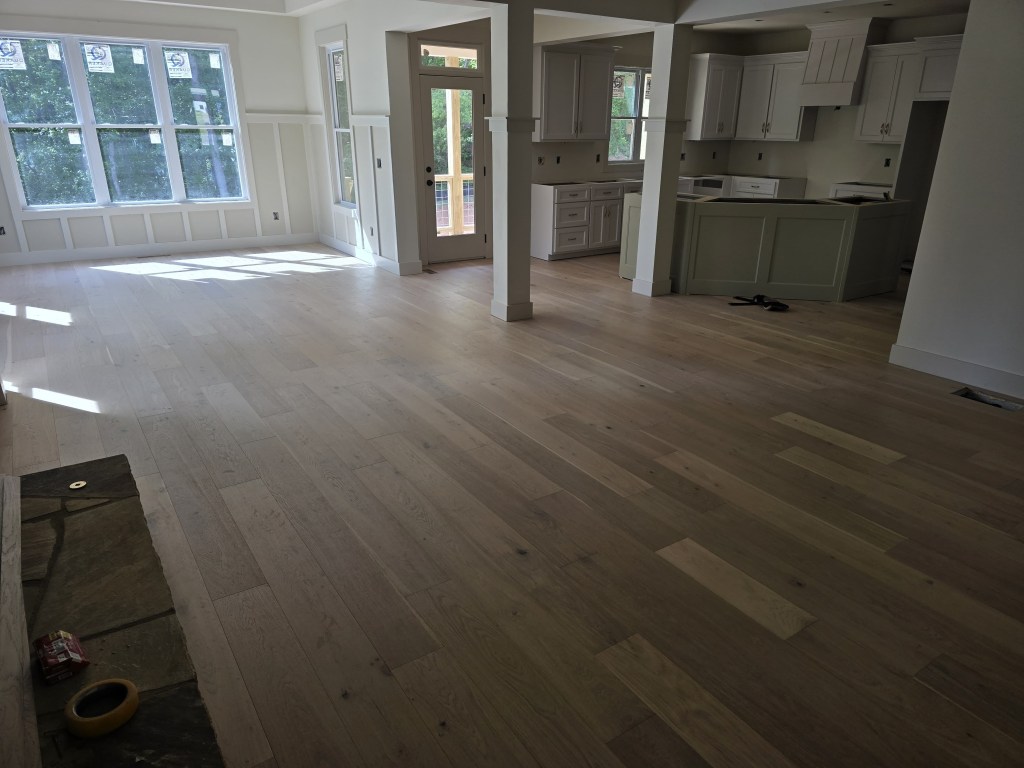
What is the difference between prefinished and site-finished engineered hardwood?

Site-finished engineered hardwood is installed unfinished and sanded, sealed, and topcoated on site — the finish cures in the home. Prefinished engineered hardwood, like the RW Floors Kells used on this Canton project, arrives with the factory urethane wear layer already applied, and no finish work is performed on site. Both approaches are valid. The right fit depends on project timing, the home’s other trades, and the finish system selected.

Related Work

For a prefinished engineered hardwood project in a custom pattern — herringbone with a custom border — see our Monroe Herringbone Installation project page.

For a site-finished engineered white oak installation on a different substrate — concrete slab with full moisture mitigation and site finishing — see our Chateau Elan Engineered Installation project page.

For hardwood floor refinishing and restoration using professional finish systems, see our Hardwood Floor Refinishing & Restoration page.

For engineered and prefinished hardwood floor installation in Atlanta, see our Engineered & Prefinished Hardwood Floor Installation page.

For more on subfloor preparation, moisture control, flatness correction, and the conditions that must be addressed before hardwood installation begins, see: Subfloor Preparation for Hardwood Installation in Atlanta

Classy Flooring ATL serves homeowners and builders in Atlanta, Canton, Alpharetta, Milton, Roswell, Johns Creek, Buckhead, Sandy Springs, Brookhaven, Dunwoody, Braselton, and surrounding North Georgia communities.